
A short guide to getting your master artwork ready for Flexlio, plus a full walkthrough video.
Before you generate: naming your layers
Flexlio looks at the names of your layers to understand what each one is, which is your headline, which is your button, which is your logo, and so on. Give your layers clear, simple names and Flexlio will find them automatically.
| DESIGN ELEMENT | WHAT FLEXLIO DOES WITH IT | LAYER NAME |
|---|---|---|
| Background | Extends to fill the new size, solid colours never distort. | background |
| Logo | Scaled proportionally so it stays sharp and correctly sized at every output. | logo |
| Button / call to action | Repositioned and resized to match each new layout and never mistaken for a background shape. | CTA or button |
| Headline | Resized and repositioned for each new size, and stays in sync whenever you edit the original. | headline, header, or title |
| Small print / legal text | Resized to fit and checked against each platform's safe zone, flagged if it sits too close to an edge. | legal, terms, T&Cs", or disclaimer |
| Body copy / subheading | Can be split into multiple lines or badges, in the order you choose. | subhead, body, copy, or offer |
| A frame or shape behind your text | Stretches to fit around your other content as the layout adapts. | panel |
You don't need to use these words on their own, you can name a layer "Main Headline" or "Hero Title" and Flexlio will still find it, because it just needs to see the word somewhere in the name.
One important exception: if you're naming a button or call-to-action, make sure "CTA" stands on its own as a word, don't let it get absorbed into another word. For example, a layer named "Rectangle" will NOT be read as a CTA just because those letters happen to appear inside it. If in doubt, name the layer something simple like "CTA Button".
If you have more than one line of body copy or a few small tags/badges under your headline, you can control the order they appear in by adding a number to the name, for example "Subhead-1", "Subhead-2", "Subhead-3". If you don't number them, Flexlio will lay them out top-to-bottom in the order they naturally appear on the page.
If a text layer sits directly on top of a shape or pill behind it (like a small badge with text inside), and both are named as part of the same subhead group, Flexlio treats them as one single piece, so they won't accidentally get separated or duplicated when your banners are generated.
What if I don't label anything? Flexlio will still try its best guess, based on things like text size, but this is far less reliable than naming your layers properly. A few seconds spent naming layers up front saves a lot of clean-up later.
Using components and instances
Update your instance directly on the master, select the frame, then press Sync. Flexlio pushes the change out to every matching instance across your generated banners. Working from multiple masters, update the instance on each one and select all of them before syncing, since a change only pushes out from the master it was made on.
Positioning and text settings
A couple of Figma basics make a real difference to how well your master holds together once Flexlio starts generating different sizes from it:
 Constraints and anchoring
Set constraints on your layers, so Figma knows whether something should stay pinned to a corner, an edge, or the centre as the frame changes shape.
 Text box settings
Choose the right resizing setting for each text box, whether it should grow with your text, stay a fixed size, or wrap automatically. Getting this wrong is the most common reason text ends up cut off or overlapping once a new size is generated.
Watch the full walkthrough
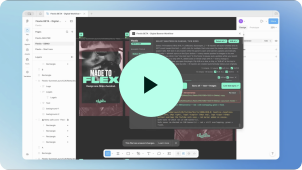
A complete run-through: setting up a master, selecting sizes, generating a full banner set, and checking safe-zone warnings.
New to either of these in Figma?
These official guides cover the fundamentals clearly:
